Appearance customization
Layout style changes the overall design of your Live Chat and Call widgets. If you change this style in Live Chat settings, the Call widget's style will also change accordingly and vice versa.

You can choose from 3 default designs that are clean and easy to adapt to any website.

After selecting a layout style, you can select a View to edit.

The views are Pre-chat form, Welcome message, Conversations, Offline, and No connection.

Pre-chat form is a form that collects visitor’s information before entering a chat. Welcome message is the message that pops up to greet your visitors. If the pre-chat form is enabled, the welcome message is the first message visitors see after filling in the form.
There are two ways to approach your visitors through the Live Chat widget:
- Get visitors’ information before starting the chat. To do this, go to the Pre-chat form view and enable the option Display pre-chat form. Then, go to the Welcome message view and create a message to greet visitors after they have filled out the form.

- No need to wait for visitors’ information, proactively greet them first. To do this, go to the Pre-chat form view and disable the option Display pre-chat form. Then go to the Welcome message view to create a greeting message.

Watch the video below for visual instructions!
Display Pre-chat form
By enabling the Pre-chat form, visitors will see this form when they first open Live Chat. After filling in the form, they will be greeted with a Welcome message. From here, they can start chatting with you.

If the Pre-chat form is disabled, visitors will NOT see this form and will be greeted with a Welcome message.
Header
You can change the title and description text of your header.

Header background color and text color are the colors of your widget background and icon. To change these colors, go to General settings.
Form
Select which information to collect from your visitors by enabling or disabling the fields. You can change the placeholder text and make a field required. Visitors can’t skip the form if there’s a required field.

Enable Privacy policy consent if you want visitors’ agreement to your policy before they start chatting with you. Visitors cannot enter chat if they haven’t checked this box. You can change the consent message and insert the link to your policy.

For styling, use the color pickers to change the color of your input background, input text, and placeholder text.

Below the form is a button for your visitors to finish their form filling and start a conversation. You can change the label for this button.

If no form fields are required, a Skip button will appear. You can also change the label of this button.

The button color follows the visitor message color. To change this color, select the Conversations view and edit the visitor message’s background color.

GDPR Compliance
Our widgets will collect visitors’ country code and browser info by default. IP addresses will not be processed due to the GDPR. Learn more about the GDPR here.

By checking this box, the widgets will comply with GDPR and will not collect visitors’ IP addresses. By unchecking this box, you allow the widgets to collect visitors' IP addresses.
Welcome message is the message that pops up to greet your visitors. If the pre-chat form is enabled, the welcome message is the first message visitors see after filling in the form.
There are 2 types of welcome messages: Quick replies and Scenario.

The first type allows you to send a text message along with some quick replies. A quick reply is a pre-formatted and interactive response that appears as a button on the chat screen. The button label becomes a text message in the conversation when selected.
The second type allows you to send a predefined scenario (chatbot) to your visitors.
Quick replies
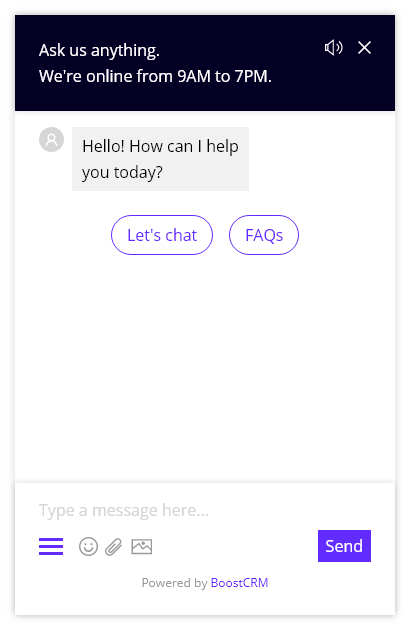
You can change the text message and set up some quick replies to go with it. For each quick reply, you can change its label and select which scenario it triggers.

To configure the triggered scenario, first, you need to set up an automation template for Live Chat in the General settings. In case the selected template does not contain any scenarios, create one by clicking on the button Create a scenario.

Hover over a quick reply and use the ↕ icon to change its order, or the ✕ icon to remove it.

Scenario

To make a scenario your Welcome message, first, you need to set up an automation template for Live Chat in the General settings. In case the selected template does not contain any scenarios, create one by clicking on the button Create a scenario.

For message trigger, you can select who to send this message to and when it strikes.

If you select first-time visitors only, visitors will receive this message the first time they visit your website and will not receive this message when they revisit. If you select returning visitors only, visitors will not receive this message the first time they visit your website and only see it on revisits. Check both boxes if you want to send your welcome message to all visitors every time they visit your website.
For trigger action, you can choose to send your message right after visitors visit your page (or after a delay), or when they click on Live Chat.
Header
You can change the description text on your header in this view.
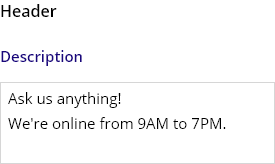
Header background color and text color are the colors of your widget background and icon. To change these colors, go to General settings.
Conversation area
Use the color pickers to change the background and text color for agent messages and visitor messages.

The visitor message’s background color will be the primary color of your widgets. All buttons will follow this color.

Typing area
You can change the placeholder text for the typing area.

The color of the typing background, typing text, and placeholder text follow the colors of the input fields in the Pre-chat form. To change these colors, select the Pre-chat form view and edit the input background, input text, and placeholder color.

Outside operating hours, your Live Chat will appear offline. The offline view is different depending on if Live Chat automation is on or off.
To configure operating hours, go to General settings.
Automation off
Visitors will see this offline notification outside operating hours if you're disabling automation for Live Chat. If automation is enabled, visitors will see a message notifying them that they are going to chat with a bot (see the section below).

This view allows visitors to leave you a message when all of your operators are offline. This message will go to your inbox and you will receive an email notification (if you enable receiving email notifications in Settings), or a push notification on your mobile device (if you install our mobile app).
You can change the title and description text in this view, as well as the placeholder for your Leave message text field and button label.

Automation on
Visitors will see this bot greeting outside operating hours if you’re enabling automation for Live Chat. If automation is disabled, visitors will see a simple message notifying your offline status (see the section above).
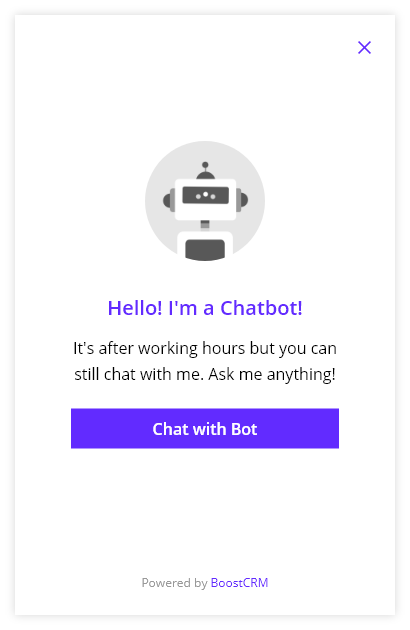
You can change your bot picture or use our default picture for your bot. You can also change the title and description text in this view, as well as the Start chat button label.


